From start to finish, the hardcover building construction process is revealed.
We combined with the previous project interior decoration project construction experience, the preparation of the fine decoration project construction process. For hydropower, carpentry, tile, paint, and supporting unit construction methods to be refined, and some nodes with on-site pictures and node diagram key description. Let the relevant management personnel on the custom installation of a system of understanding, system ideas.
01
Preparation phase
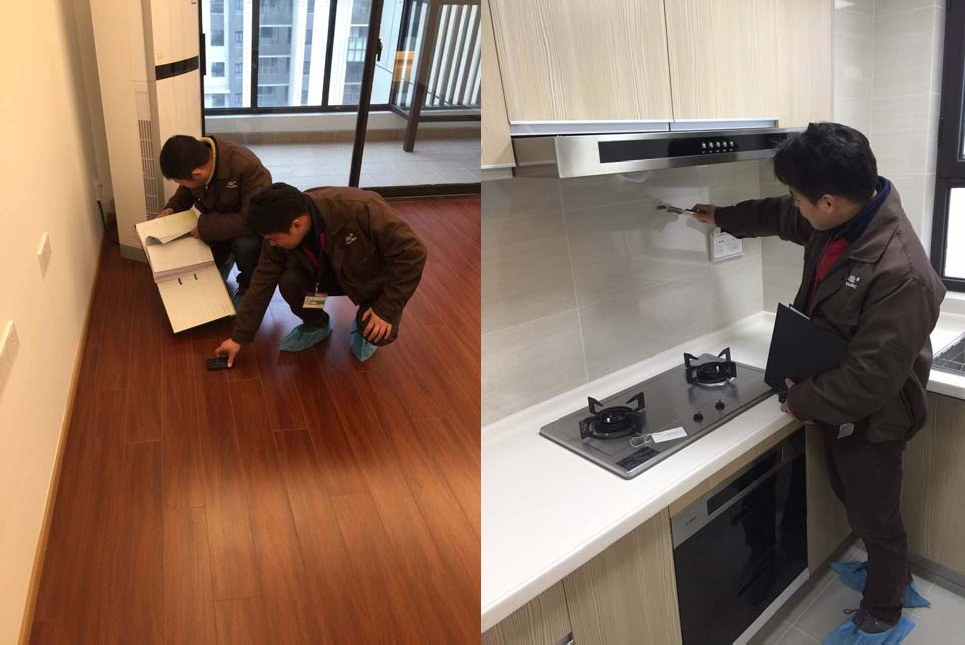
1.1 Site standardization
Comply with the construction safety and civilization image management regulations, in the construction site in the appropriate location to correctly post signs and stickers, set up signs, and fire-fighting facilities.
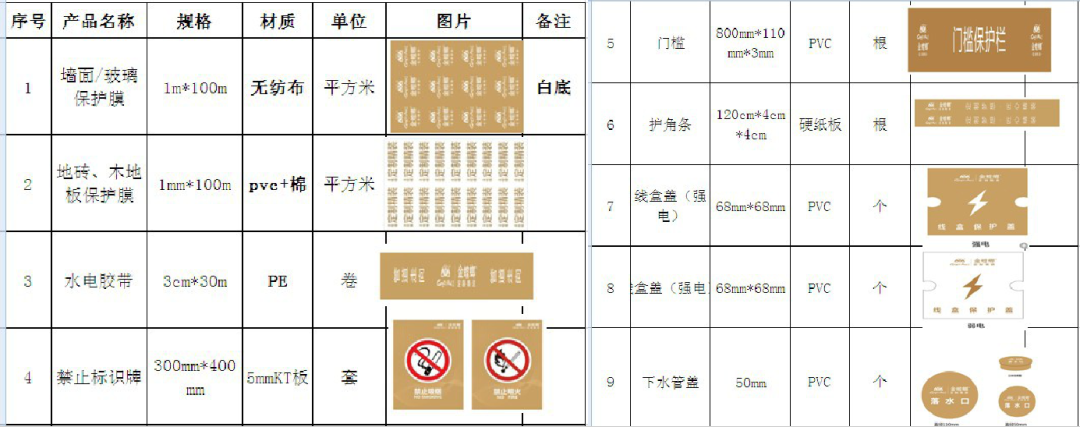
Custom hardcover finished product protection dimensions list
1.2 On-site preparation
On-site:
Whether the original hydropower, electricity, and water are normal, the degree of hydropower is confirmed. Whether there is a water leak under the upper floor;
Whether or not to save and remove the project, if any, determine the demolition project and location (the demolition project must be approved by the property management department). copy documents, customer signatures, project department filings);
The water improvement scheme, such as water point and pipeline arrangement, is determined and marked;
Go through the start-up procedures, confirm the start time, fill in the on-site delivery slip.
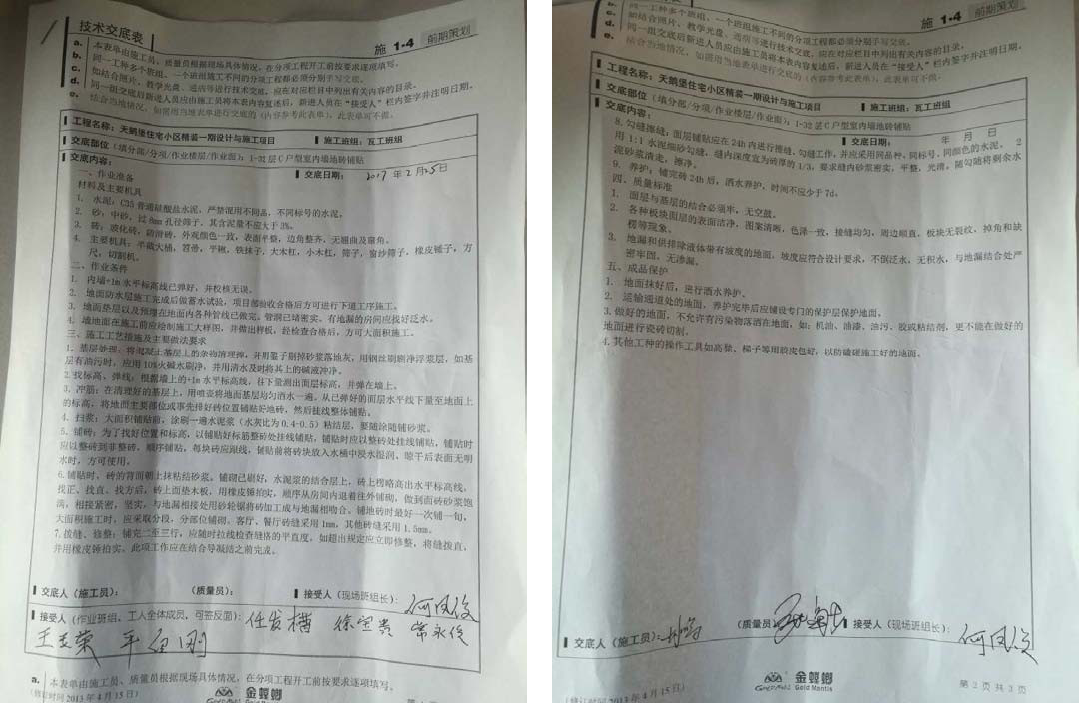
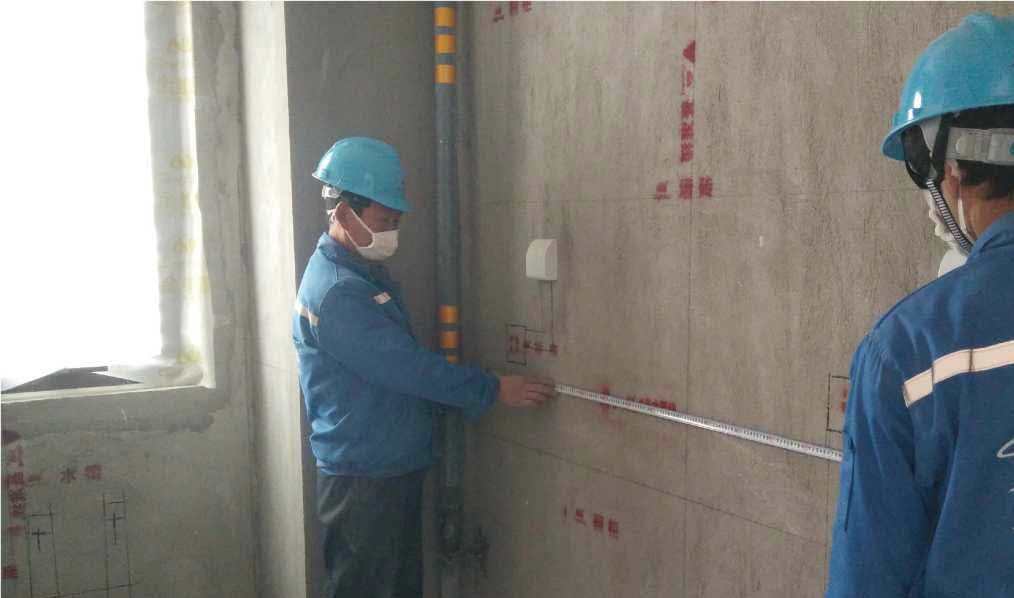
Technical bottom:
The bottom bit of the cross;
The content of the cross-section should be targeted, and the project situation is consistent;
The team needs to sign the confirmation;
If necessary, provide on-site guidance.
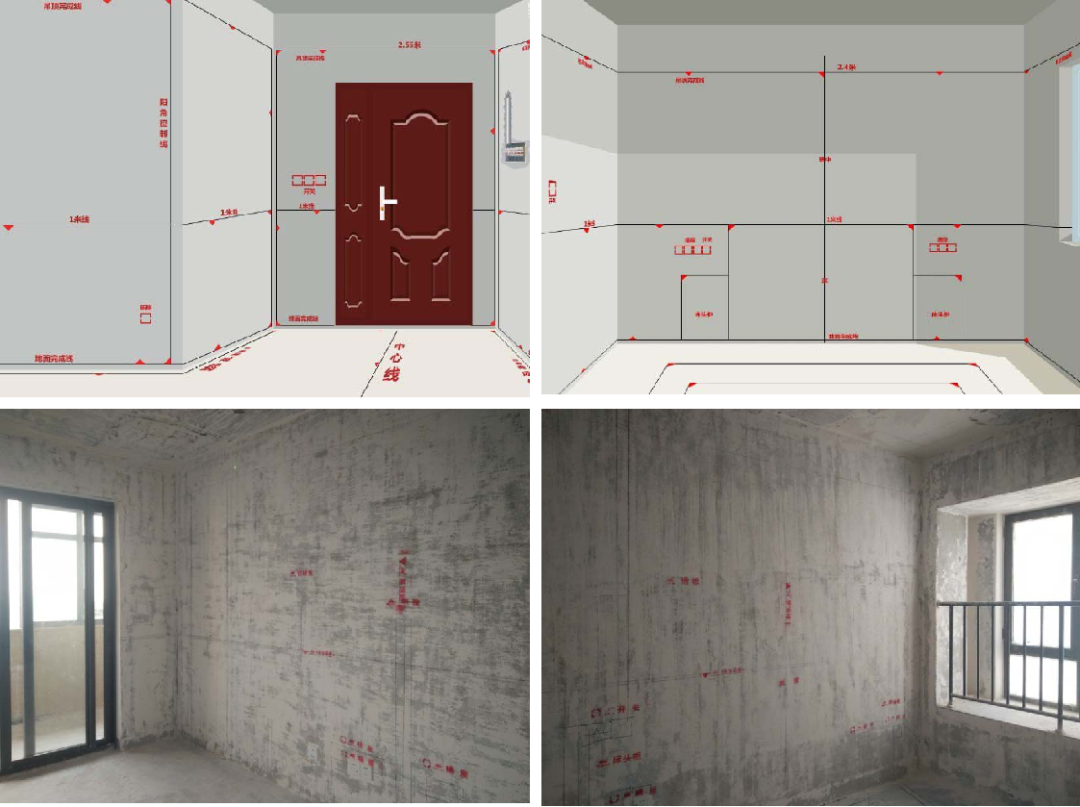
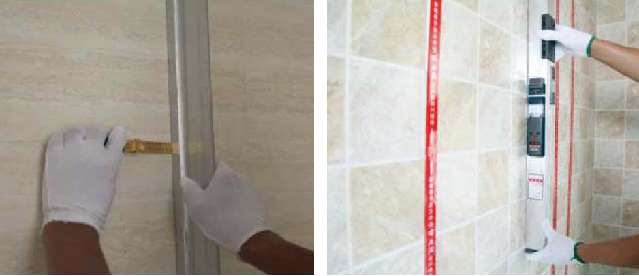
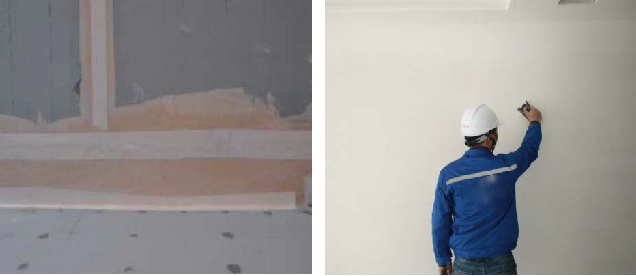
1.3 Pre-release line
The “crosshairs” of each room are released according to the civil axis, and the “center control line” of each room is released according to the drawing requirements. Line release work should be done after the original earthen putty is eradicated.
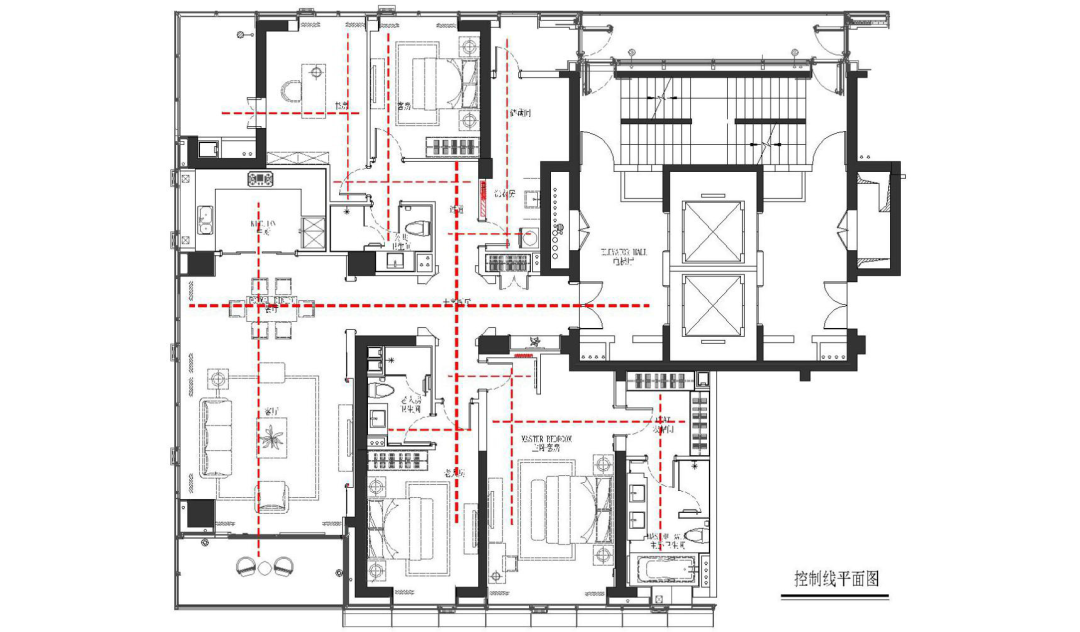
Control line plan model
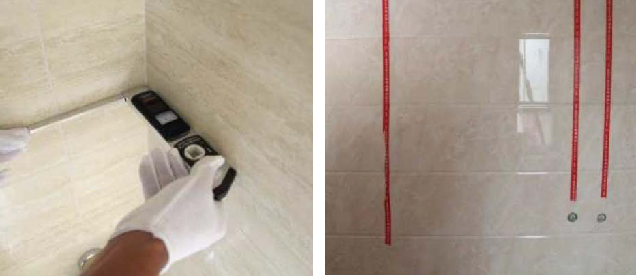
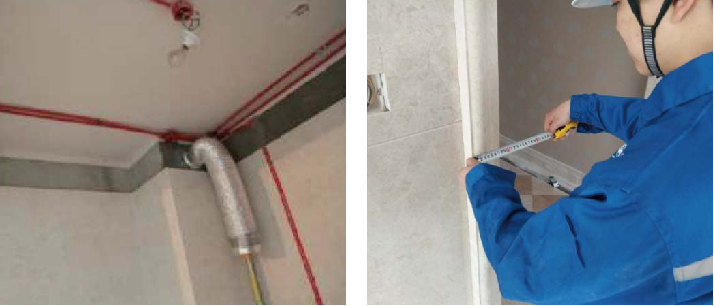
1.4 Hydropower point confirmation
The distance, quantity confirmation of the inlet, outlet, water meter;
The distance and quantity of gas pipes, exhaust vents, and gas meters are confirmed;
The distance and quantity of switches and sockets are confirmed;
On-site marker pen, fill out the room water and electrical location survey form, on-site deepening designers, and other signature confirmation;
All water and electricity sites must be confirmed by the owner, and make a confirmation record.
02
Hydropower phase
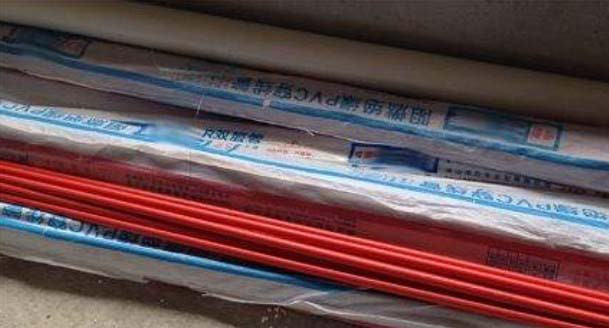
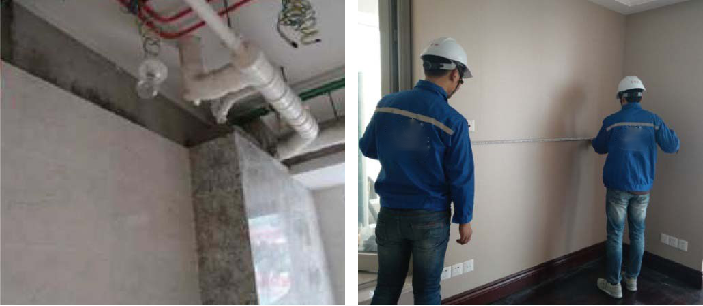
2.1 Auxiliary material entry
Acceptance of inbound materials, check whether the delivery order number, brand, and the company’s requirements of auxiliary materials are consistent; Whether the material is damaged.
2.2 Hydropower starts
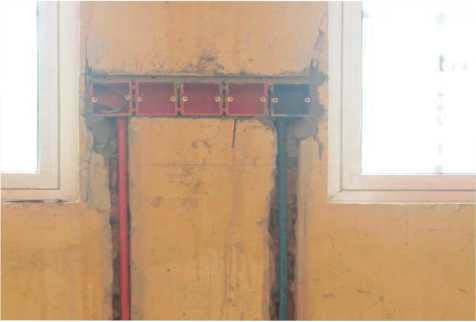
Strong and weak electrical tubes should be color separation installation, respectively, using red, blue PVC tubes to distinguish;
The parallel spacing between the weak power line and the lighting socket line should not be less than 300mm;
When cross laying must be vertical distribution and the same system must not have more than one intersection, strong and weak wires can not be placed in the same pipeline or line slot.
2.3 Hydropower demolition
Wall ground dark tube installation, wall ground groove should be straight, no distortion, slotting horizontal vertical, a wall should not allow the appearance of cross groove. It is recommended to use environmental protection professional slotting machine construction.

Bullet positioning: According to the construction drawings and hydropower piping scheme in the wall, the top surface of the bullet line marked the groove, hole position, and direction.
Dark dressing grooves: When the embedded wall is dark, use special tools to cut the grooves. The groove depth is 15mm larger than the outer diameter of the tube, the groove width ratio is 20 to 30 mm larger than the outer diameter of the tube, and the size of the part of the tube and tube card is appropriately increased.

2.4 Hydropower covert
When installed at a hot and cold level, the hot water pipe should be above the cold water pipe (hot and cold);
When vertical installation (facing the water pipe) is left hot and right cold, the appliance connection should be left hot right cold;
The hot and cold water pipe is parallel to 150 to 200mm, and the horizontal error of the hot and cold water outlet is ±5mm
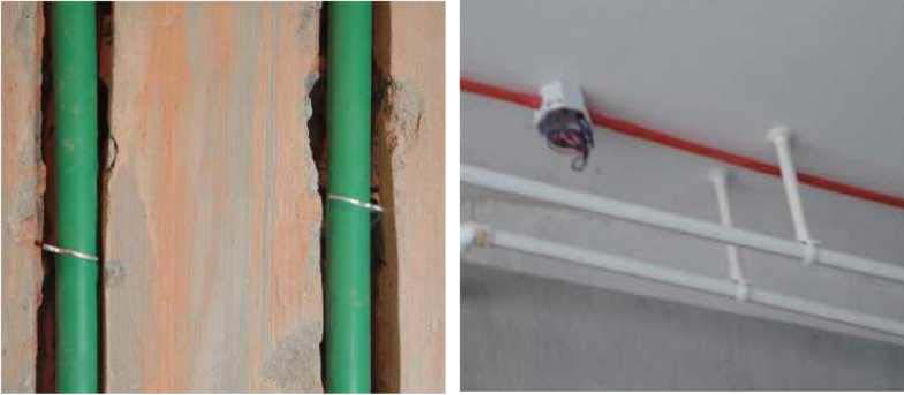
Hot and cold water pipe should be color-coded installation, hot and cold water pipe should be used in blue, red PPR pipe (or use color-coded pipe).

Pipe fixation: with a special tube card or copper wire to secure the pipe in the pipe tank, the nominal diameter of DN20 pipe fixed spacing is not greater than 800mm; The end and corner are not greater than 200mm;
Pipe laying: water and electricity pipeline ceiling installation and laying, should follow the wire pipe on, water pipe under (electric underwater), parallel spacing is not less than 200mm.
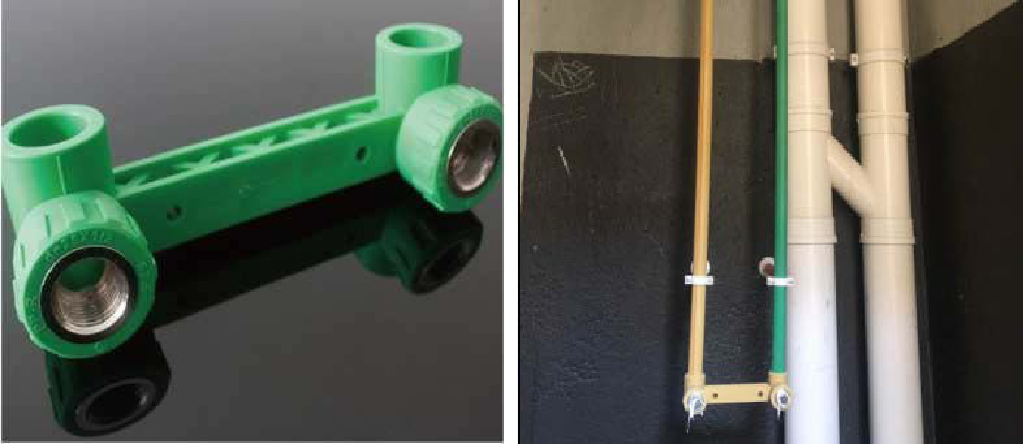
PPR shower locator: hot and cold water pipe outlet level position must be accurate, installation level, height, depth consistent, no special requirements of the shower room hot and cold outlet spacing 150mm—; Double inline wire elbow.
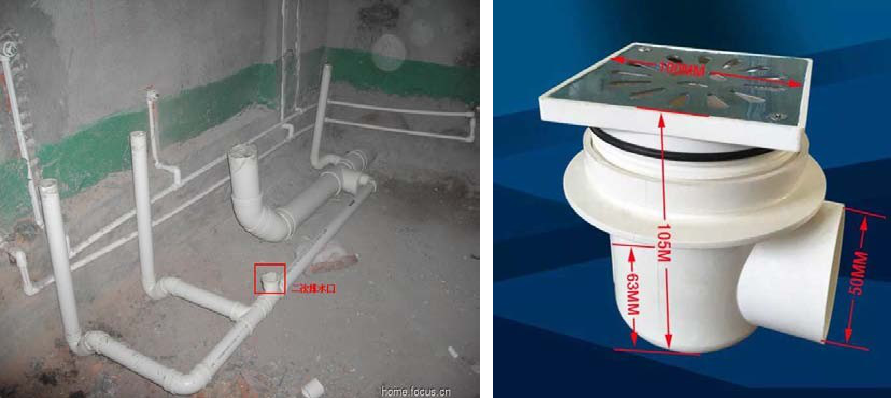
Second drainage leakage: sinking toilet In the case of long-term use, sewage may leak into the tank, and then accumulate in the deposit box, the tank long-term soaked sewage, may spill into the room, or will leak to the downstairs owner’s home, can use the secondary drainage practice to add a deodorant PVC same-layer drainage leakage can solve this problem.
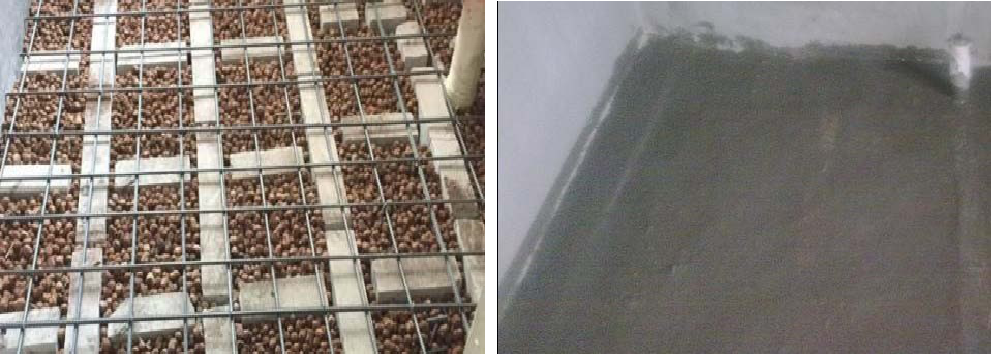
2.5 Underfloor heating installation
The shower area does not allow the laying of underfloor heating coils;
No joints must be in the same underfloor heating coil;
C20 concrete surface edge with 10mm thick extruded insulation plate as a telescopic seam;
After the solidification pouring is completed, the maintenance is not less than 7 days. The concrete surface does not allow any material to be nailed in.

Cross-sectional practice
03
Woodwork oil stage
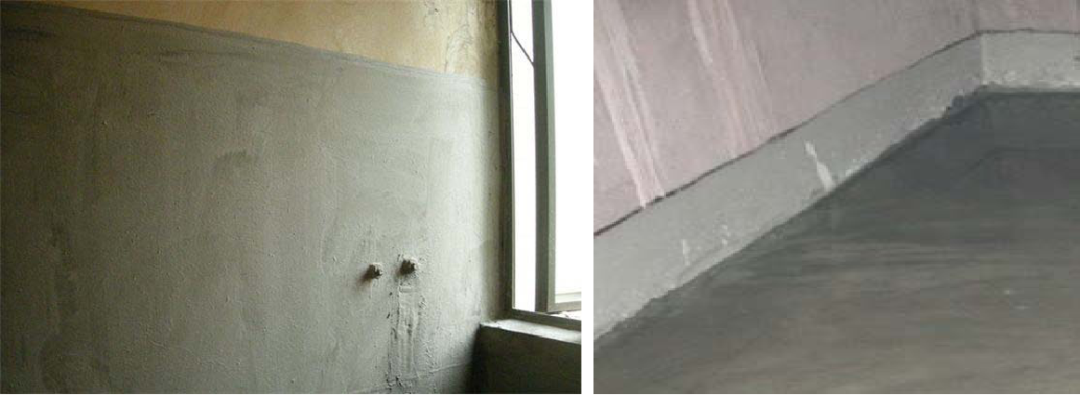
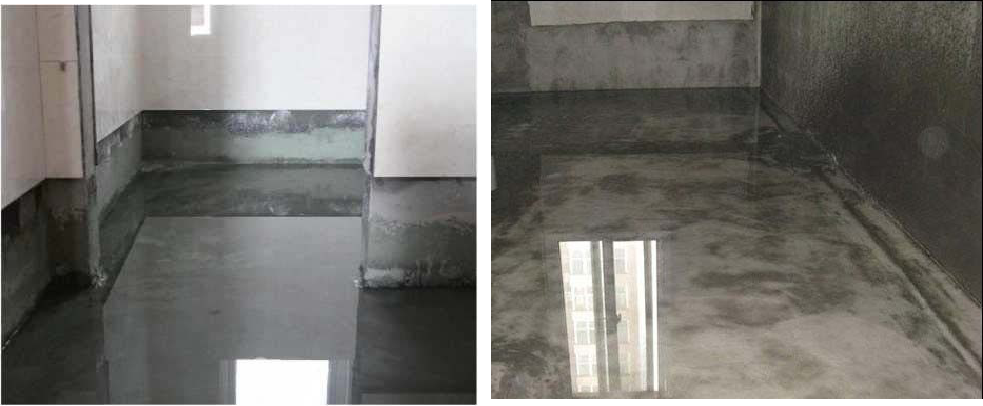
3.1 Bathroom waterproof
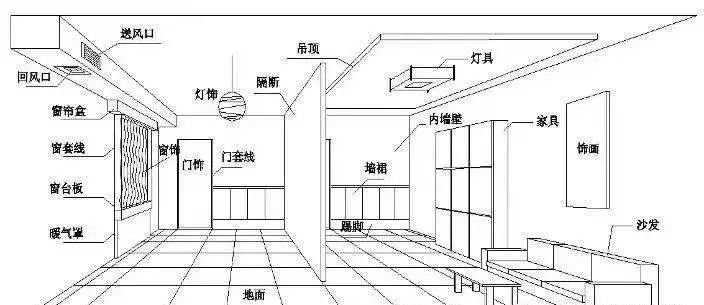
Shower area waterproof: shower room by shower Rainshower wall Waterproof layer without special design requirements, waterproof layer height must not be less than 1800mm; The height of the waterproof layer at the basin is not less than 1200m.
Corner waterproof: Non-shower position waterproof height is not less than 300mm.
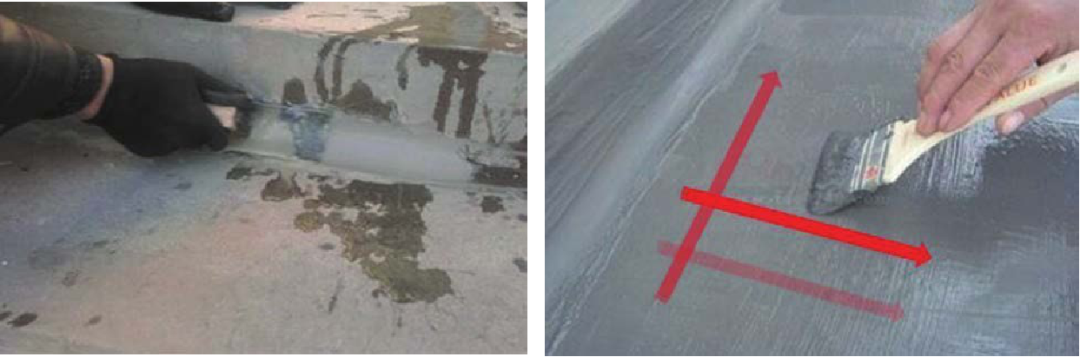
Angle treatment: 1:2 cement mortar is smeared with an arc with an arc-shaped iron smear with a diameter of 50mm, and a nonwoven or glass fiber cloth not less than 300mm wide is used as an additional layer, with a vertical joining length of no less than 50mm。
Waterproof brush direction: Waterproof coating brush at least 3 times, each brush direction is vertical to each other.
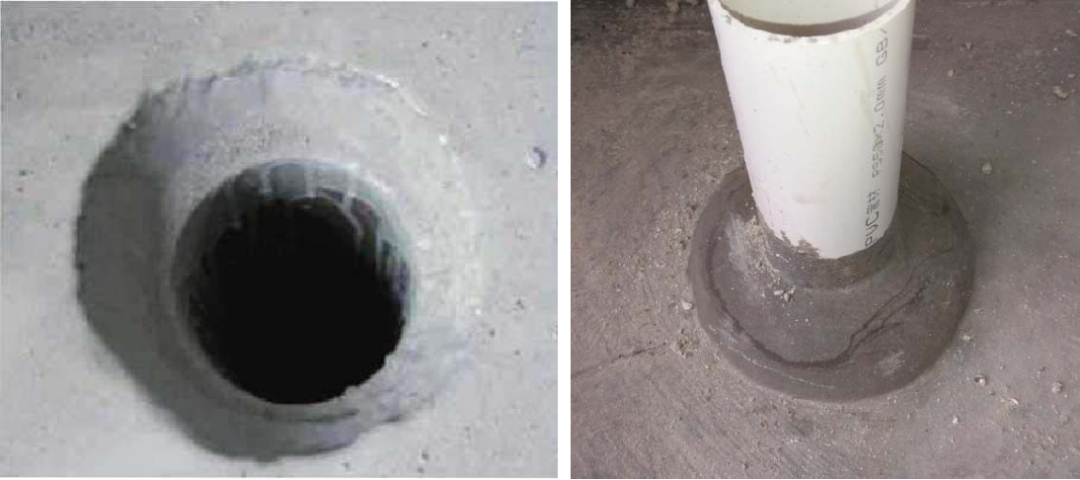
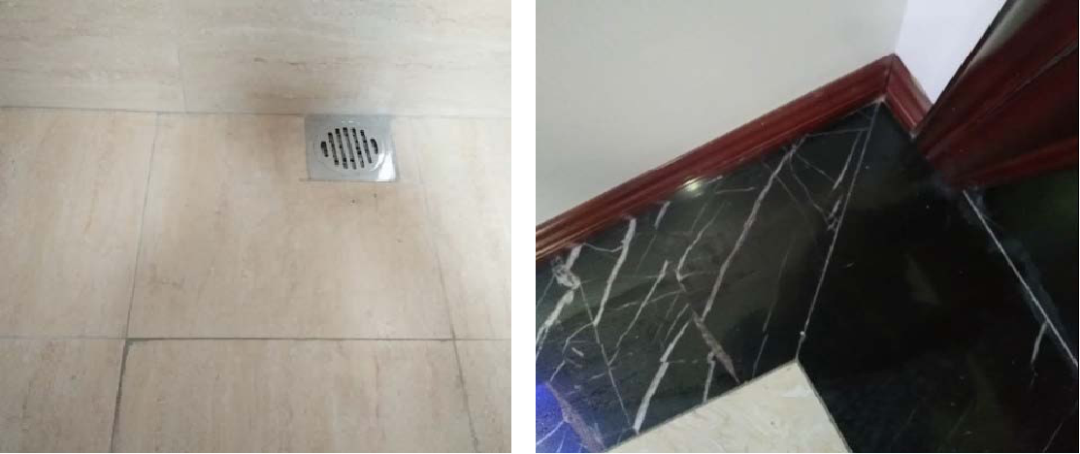
Ground leak waterproof treatment: ground leak waterproof to do bowl mouth treatment, waterproof must be painted to the inside of the ground leak 10mm.
Strengthening treatment: pipe roots and other parts 1:1 Cement mortar for arc angle protection for sealing treatment, and then non-woven or fiberglass cloth as an additional layer, and waterproof enhancement treatment.
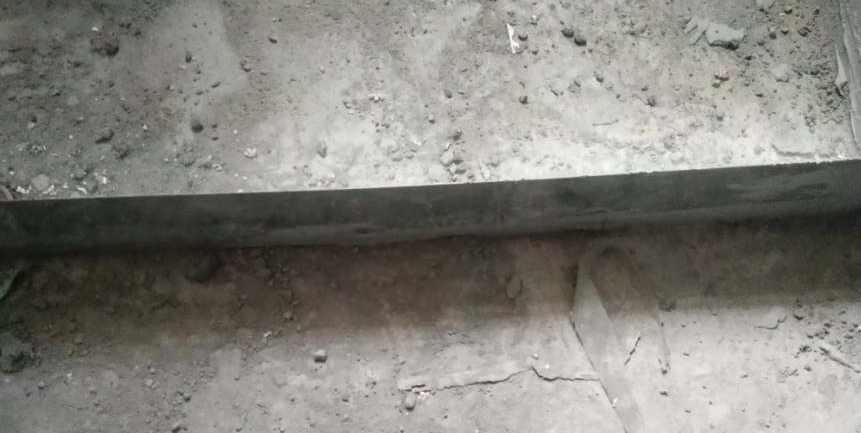
Dry and wet partition do Stop water bar: water stop can be used concrete, galvanized iron, or flat iron to construct, the edge needs to be sealed with cement mortar and waterproof layer tight. If the use of metal water stop belt, bathroom concrete bottom and side need to open a depth of 10mm small groove, water bar installation into the slot, and with waterproof material sealed tight.
Bathroom threshold stone waterproof:1 can be in the lower part of the threshold stone and the wall the same width of the dark concrete water stop belt. 2, priority installation threshold stone, the use of wet paste method installation, maintenance 3 to 7 days after four weeks with waterproof material blocking. Then paste the bathroom wall tiles or stone.

3.2 Sinking toilet drainage on the same floor
After the sinking toilet tank test water pass, fill in the sink box with ceramic grain, and then use 40 thick C20 concrete water to find flat, built-in s4-200 cold pull wire, pouring concrete, with a wipe, maintenance 7 After the day, do waterproof layer and closed water test.
3.3 Closed water test
Closed water test: The water storage depth of the closed water test is not less than 20mm above ground, which is suitable for 30 to 50mm and the water storage time is 24 hours.
Downstairs inspection: in the early stage of the closed water test every 1 hour should be downstairs inspection, the latter 2 hours downstairs inspection, if the water seepage situation is found, should immediately stop the water test, re-water layer perfect treatment.
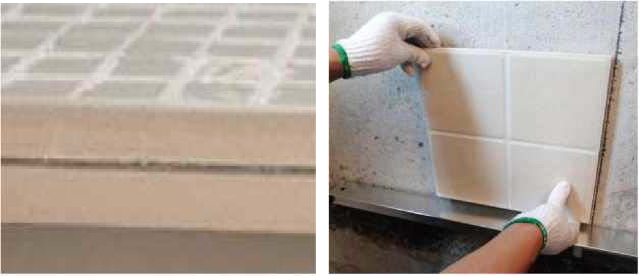
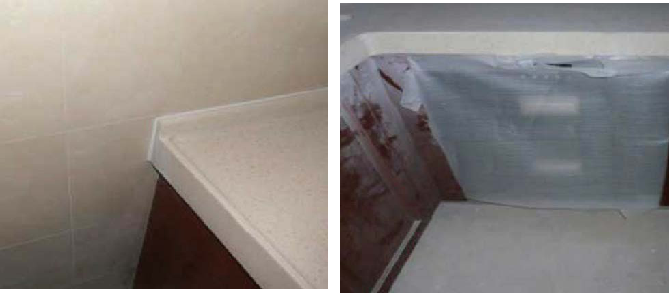
3.4 Wall tiles
Tile selection: When selecting tiles, you can select two tiles of the same model opposite the front, and then use ordinary copperplate paper folded into the gap, if you can easily enter the tile flatness is defective.
Sticky front bullet line layout: reserve the position of wall brick press tiles, and use this brick upper line as the wall tile starting layer, can use aluminum alloy ruler as the support brick bezel until the ground is completed and then the bottom layer of the wall, to achieve the purpose of wall brick cover floor tiles.
The health between the fur treatment: clean the waterproof layer of the bathroom, and then use cement, fine sand, glue stirred into a paste uniform roll coating on the wall, hair treatment, enhance the tile bonding force, prevent and control shedding.
Tile gap control: Tile crevices are uniform and wide.

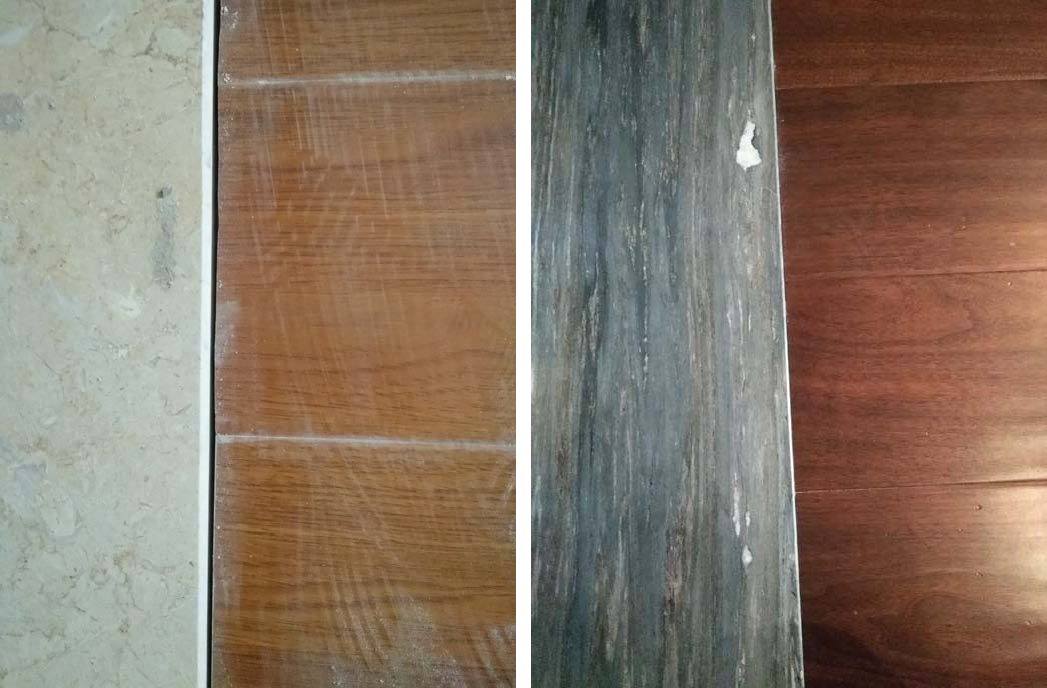
3.5 Floor tile construction
Floor tile paving: floor tile laying, first on-site layout, and then the test tile back scraped 10mm thick cement slurry;
Wall brick press tiles: Finally, a leather wall brick is pressed on top of the floor tiles, to avoid the appearance of seams, affecting the aesthetic.

Paving slope: the ground paving to the ground leakage to find slope, slope 5 to 1%.
Floor brick closing: in the wall yin and yang corner, the thickness of the kick line should be fully considered when feeding, the completion of the face angle line should cross with yin and yang angle;
3.6 Wall tile paving acceptance
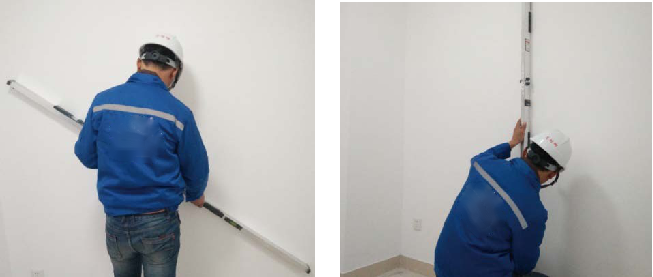
Surface flatness acceptance: Use a 2m ruler and stopper to check the surface flatness, with an allowable deviation of 3mm.
Surface Verticality Acceptance: Check the surface verticality with the Vertical Inspection Ruler, allowing a deviation of 2mm.
Yin and Yang angle square acceptance: with right angle detection ruler checks yin and yang angle square positive, allowing deviation of 3mm.
Hydropower warning sticker: tile shop after the completion, to paste the hydropower warning sticker, showing the direction of hydropower lines, to prevent the installation of products when the wrong hole.
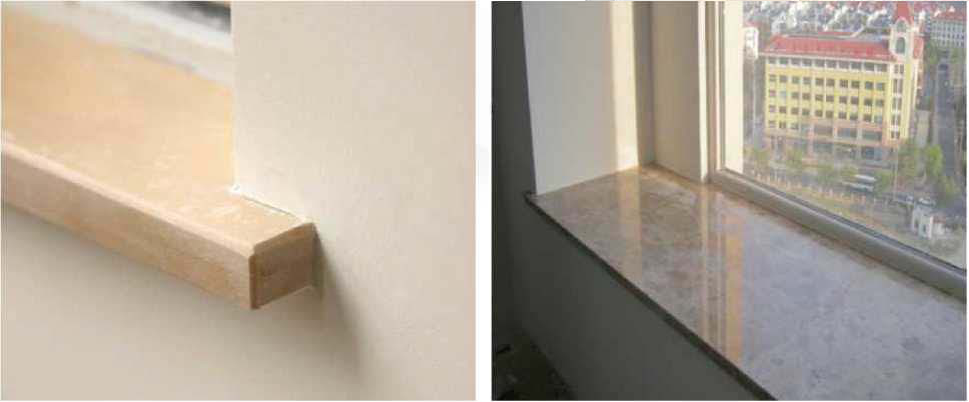
3.7 window sill mounting
The installation of window sill board is consistent with ordinary tile practice, both ends should be extended into the wall 20 to 30mm, all yang angles need to chamfer. The corner closing of the window sill board should be polished on three sides, the lower part of the outside should not have an angular and smooth surface, and the window sill board and the wall end should be smooth and clean.
3.8 Carpentry started
Positioning bullet line: Position the bullet line, determine the keel gear and sling point.
Main keel spacing: The main keel spacing is not greater than 900mm to 1000mm;
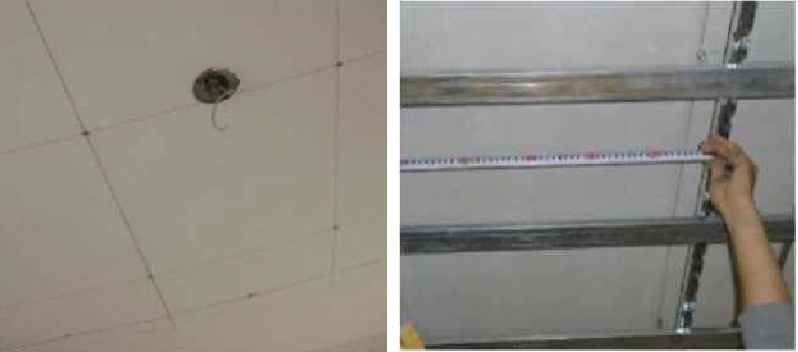
Sub-keel spacing: The spacing of the para-keel is generally 300 to 400mm, depending on the design.
Side keel fixation: Side keel fixation should be fixed with wooden screws on the wooden needle or the use of expansion bolts, strictly prohibited use of wooden nails or nails fixed.
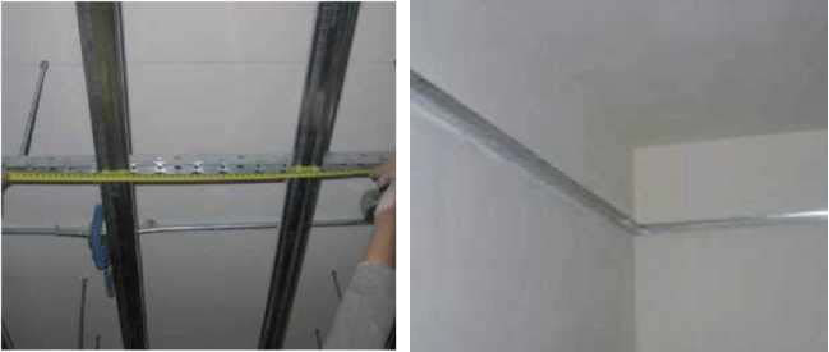
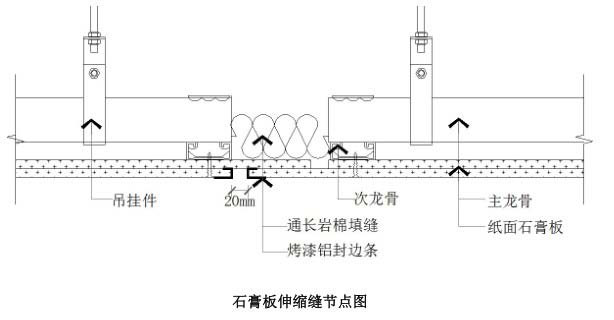
Stretching seam settings: Some of the ceilings with a span greater than 15m and an area greater than 100 m2 should be left in the appropriate place.
3.9 Carpentry acceptance
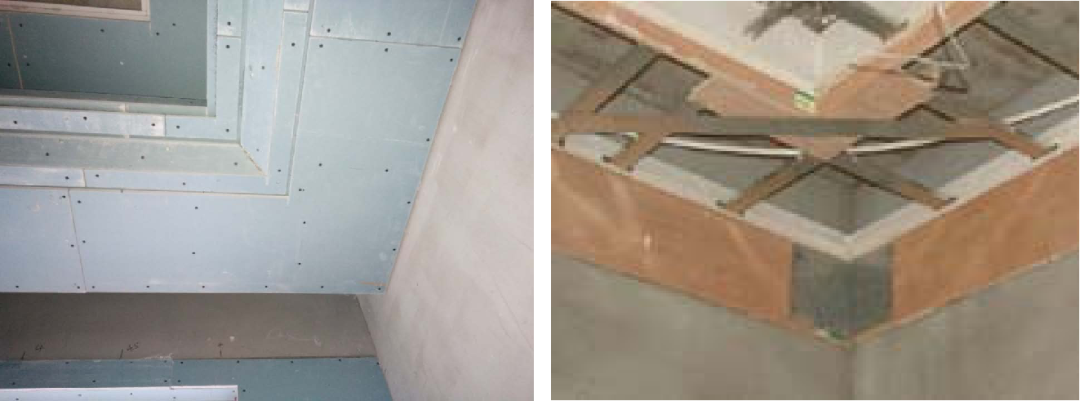
Gypsum plate seam and nail eye treatment:1, gypsum board indirect seam can be set up inverted V-type seam, seam width 5to10mm, or reserved 5 to 8mm Gaps, and uniform;2, the installation of gypsum board of self-tapping screw nail cap needs to sink into the surface 0.5 to 0.7mm, but do not break the paper;3, Nail cap coated with rust-proof paint, putty with rust-proof paint to make up.
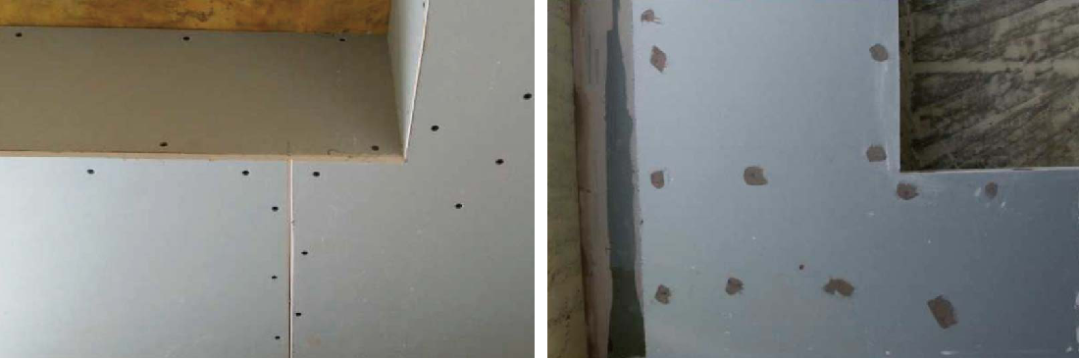
Gypsum board treatment at corner: Gypsum board ceiling must not be set at the corner gap, yin or yang corner gypsum board must be L-type set-up, galvanizing special parts reinforcement or other reinforcement measures.
3.10 Oil works start
Gypsum board crevice treatment: Gypsum board seams are first sewn with high-strength gypsum, and then attached to anti-cracking paper tape or fiberglass mesh cloth.
Wall scraping putty: The number of scratch putty passes is determined by the flatness of the wall, usually three times.
Putty grinding: Putty drying with fine sandpaper polishing delicate flat.
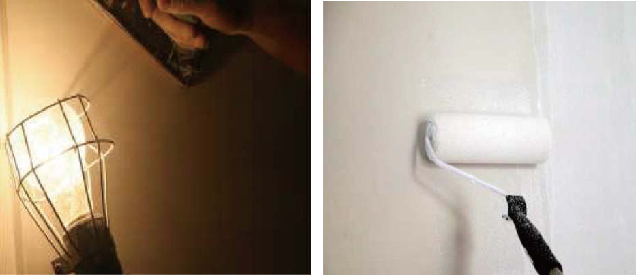
Brush latex paint: latex paintbrush evenly, generally coated primer once, face paint twice.
3.11 Oil works acceptance
Latex paint perception acceptance: the surface layer without pan-alkali, bite color, flow fall, mole, powder, peeling, permeable bottom, sand eye, and brush pattern phenomenon.
Yin and Yang angle square positive acceptance: Yin and Yang angle square error is not large± 3mm.
Surface flatness acceptance: surface flatness error is not large± 3mm.
Vertical acceptance: The verticality error is not greater than ±3mm
3.12 Wallpaper construction
Wallpaper paving:1, clean the wall, to ensure that the grass-roots flatness;2, with colorless and non-positioned base film covered in the wall;3, draw vertical lines;4, after cutting wallpaper, the use of professional matching wallpaper, Wall cloth paste;5, flattened with scraper, compacted. The finished product needs to be flat, the seam needs to be tight, yin and yang angle to straight, good perception.
04
Installation acceptance phase
4.1 Intermediate acceptance
Project acceptance personnel on the overall acceptance of the house: to determine the pre-process is standardized following construction standards construction, to ensure that the next finished product one-time installation success
Project acceptance personnel reference: to determine that the site has installed finished product conditions, to ensure that the product and the site match consistently.
Item acceptance personnel to the kitchen and bathroom acceptance: confirm the completion of the hidden pipeline and identification, the completion surface to meet the accepted standards.
Project acceptance personnel to the bedroom acceptance: whether the ground is flat, the elevation is accurate, the surface is flat, dry;
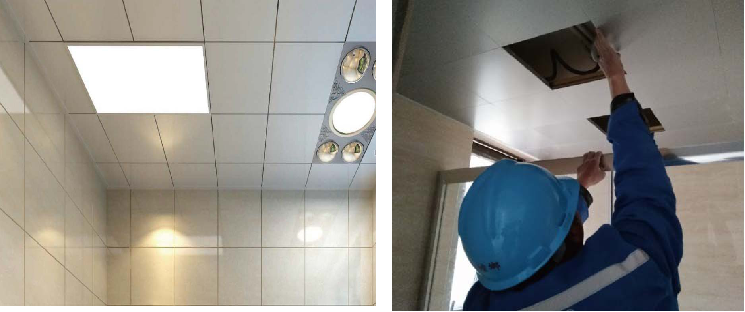
4.2 Integrated ceiling installation
Ceiling defense and positioning, installation corner line, and keel: confirm the ceiling height and mark, keel slings are installed securely and leveled, spacing meets design requirements.
Installation of buckle board and module equipment: following product installation requirements to install buckle board, lighting modules, heating templates, ventilation modules.

Fine repair and commissioning: confirm that the integrated ceiling is not uneven, neat, and beautiful, no obvious gaps, the modules are operating normally, the top is not an obvious resonance phenomenon.
4.3 Bathroom installation
Toilet installation: the early use of the installation template, but also the structure of the reservation hole to play a dimensional review role.
Glue: seat toilet installation template positioning after glue, note: glue position must be in the inside of the contour about 3mm inward, after the installation of the toilet, the surrounding silicone wipe can be.

Toilet acceptance: whether the appearance of the toilet is intact, the cover is solid, water parts in place, water smooth, no leakage phenomenon, the bottom of the glue flat.
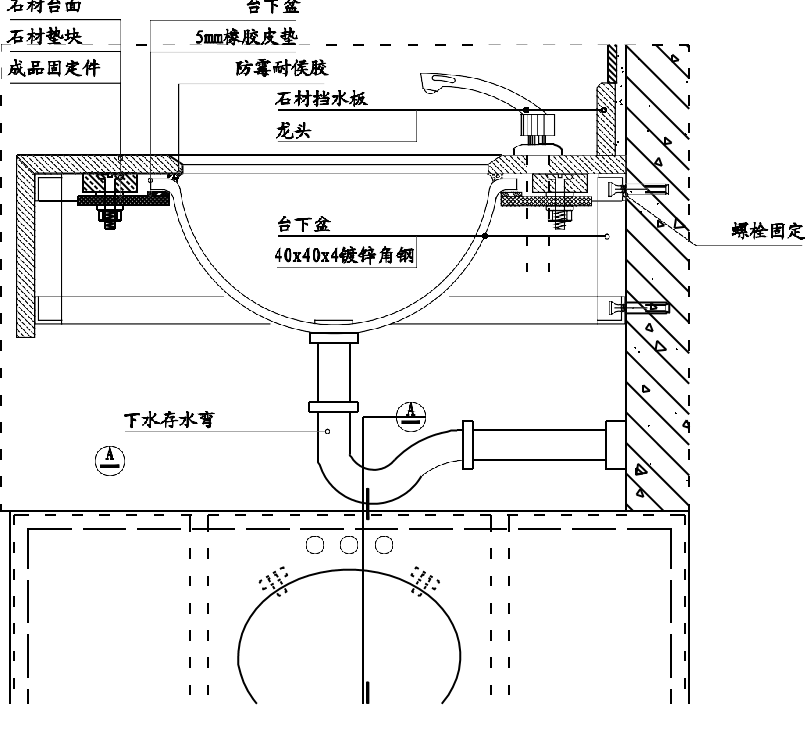
4.4 Under-basin installation
The iron frame of the basin may use the national standard galvanized angle steel, welding place to do anti-rust treatment, or the use of horizontal galvanized square steel fixed holding table basin;
For ease of removal and maintenance of the basin, the basin is fixed on the fixed components, the fixed components and stone blocks are secured with stainless steel or galvanized bolts, the back of the pad and the back of the countertop bonding area needs to be hair treatment with marble bonding fixed, the basin and fixed components at the connection need to use rubber pads, the basin and the table panel under the mouth with weather-resistant glue seal;
When installing a basin or sink, it is prohibited to install only with cloud stone adhesive, not steel frame or galvanized square steel;
4.5 bath installation
The bathtub and stone joint part according to the bathtub edge press stone practice construction, stone countertop according to the size of the bathtub cutting hollow grinding edge factory after the completion of on-site installation, stone and bathtub junction with weather-resistant glue closing;
The stone part around the bathtub is made of a 4×4 galvanized angle steel support frame, and the steel wire mesh cement sand paddle is painted before the stone is installed. The bathtub, which weighs more heavily than recast iron and other materials, is left with stone Access to dark doors, access door specifications, and direction to meet the maintenance requirements;

4.6 Cabinet installation
Cabinet installation: The kitchen cabinet is installed as a single body, according to the design drawings placed in place, all the inside gaps do not exceed 3mm.
Table panel installation: the table panel and cabinet using neutral glass glue concealed connection, table panel and wall using neutral white glass glue uniform glue connection, the width of the glue is 5to8mm.
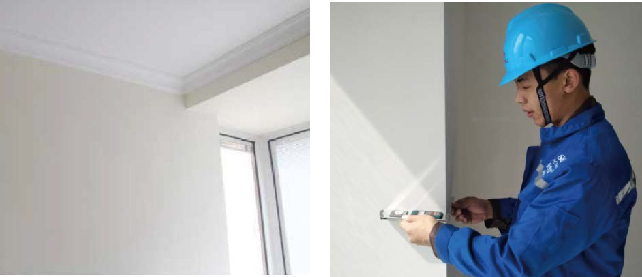
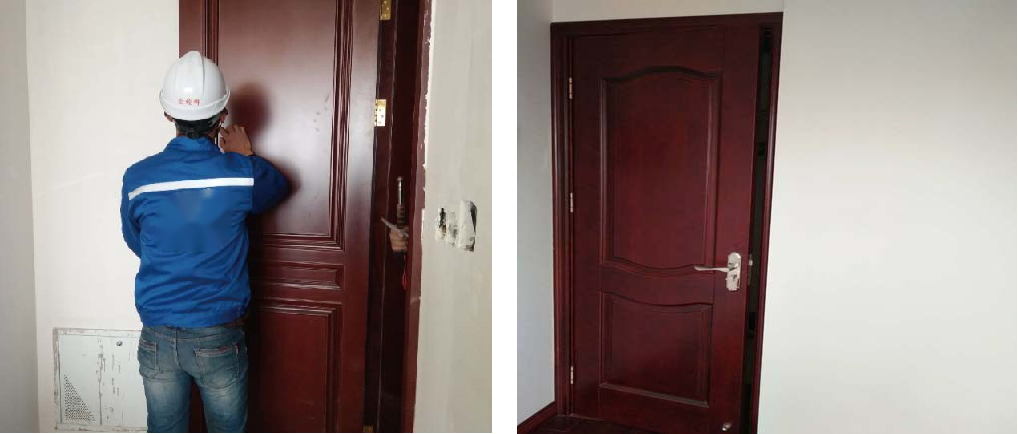
4.7 Indoor door installation
Indoor door installation:1, ordinary door configuration three 100mm joint, installation position: the first page from the top edge of the door 180mm, the second from the first 350mm, the bottom one from the bottom of the door 180mm;2, the door fan on the hardware, such as hidden closed door, page, keyhole, and another slotting, the opening must be opened before the completion of the factory paint, door sealing edge must not have burst edge, cracking phenomenon.
Indoor door acceptance: bathroom, kitchen door panel from the threshold stone reserved 6 to 8mm, verticality, diagonal and other requirements.
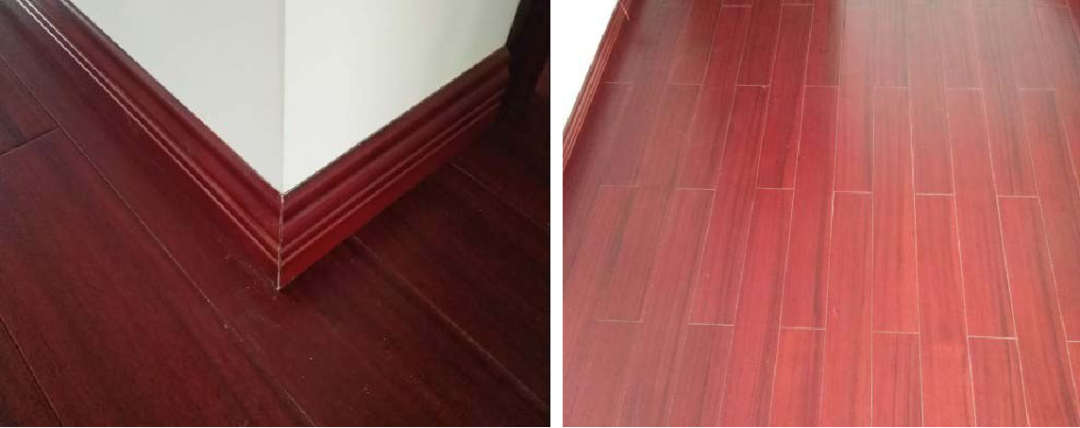
4.8 Floor mounting
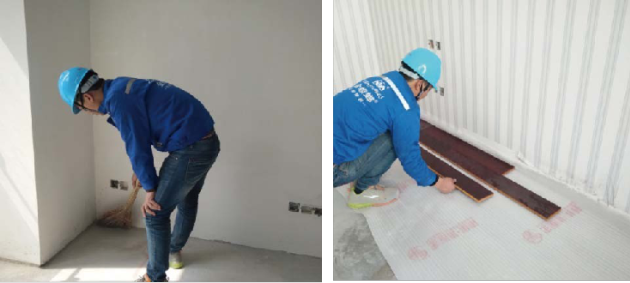
Ground leveling and cleaning: according to the thickness of the floor and measurement of the line-height to do a good job of ground leveling, and maintenance for a week. Before the wooden floor is installed, the moisture content of the ground is measured with a professional measuring instrument, and the moisture content is not higher than 8%.
Floor pre-layout: the floor should be laid before moisture-proof mats, and then pre-layout, in case of heavy color difference, should be adjusted promptly.
Floor installation: Consider the deformation of the wooden floor, the expansion seam width between the floor and the wall, and the floor fixture 8-10mm, and then install the kickline.
Groundwood flooring with threshold stone closing practice:
Method 1: The floor and threshold stone junction should be reserved for 3mm floor telescopic seams, using the same color system as the floor of the anti-hugely filling seam. To prevent the finished product from being contaminated and to control the width and straightness of the glue, the glue needs to be located with the textured paper first. The threshold stone is angled 3mmand the wooden floor is 3mmlower than the threshold stone.
Method 2: Wood floor and threshold stone seam treatment, requires wood floor cutting to pay special attention to the cutting angle, pay attention to the straightness of the seam.
The method I and Method II
Kickline installation: kick line and wall can not have a large gap, installation needs to be solid, yin and yang angle to the seam straight.
Floor acceptance: flat floor, appearance without breakage, floor and kickline no obvious color difference, no obvious installation defects, walking is no noise.
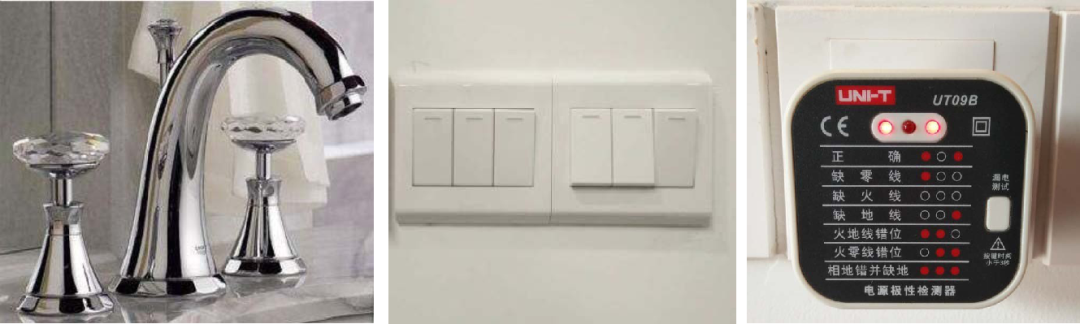
4.9 Hydro installation
Waterway survey: the waterway is free of leakage, the connection port silk buckle exposed, and wall tiles flush.
Switch installation: switch upper port from the ground decoration finish surface height of 1.4m, the same indoor installation height is consistent, the switch opening direction is consistent, the phase line must be in the switch, the open and close panel must not be installed behind the door.
Circuit test: the socket power is normal, the switch commissioning is normal, the lighting line is normal, the other routes are smooth.
4.10 Beautification and refinement
No scratches in detail: A small number of walls, floor tile scratches were polished during the construction process.
Hardware without scratches: in the construction or furniture handling process hardware pieces encountered a small number of scratches, polishing, and polishing.
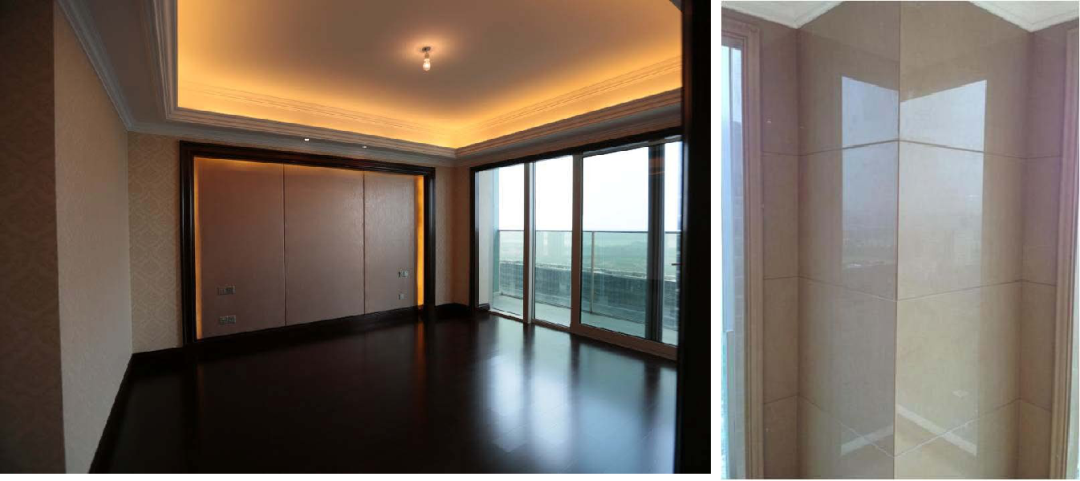
House beautification: the overall cleaning of the house, cleaning furniture residue paint or glue, no dust residue.

4.11 Finished cleaning
Cleaning should be done window clear a few net, spotless, especially dead corner out need to strengthen treatment, cleaning order should be rough cleaning – fine strengthening treatment – fine cleaning – final stone crystallization, focus on checking toilet macula, ground leakage inside, light belt, door cover mouth.
05
The project delivery phase
5.1 Check for gaps before delivery
Before delivery carefully check the existing problems in the house, and urge the construction team to repair promptly, with the developer to review the gaps, the site found can be quickly resolved, need to be resolved promptly.
5.2 After-sales repair
For the classification of the problems raised by the owners To prepare accounts, the project department shall formulate a detailed schedule of completion time to carry out centralized sales maintenance treatment, track the property and housekeeper each household to ensure the completion of quality and quantity within the time, and prevent the owner from sending letters, complaints, claims and even check-out due to improper maintenance or repair.
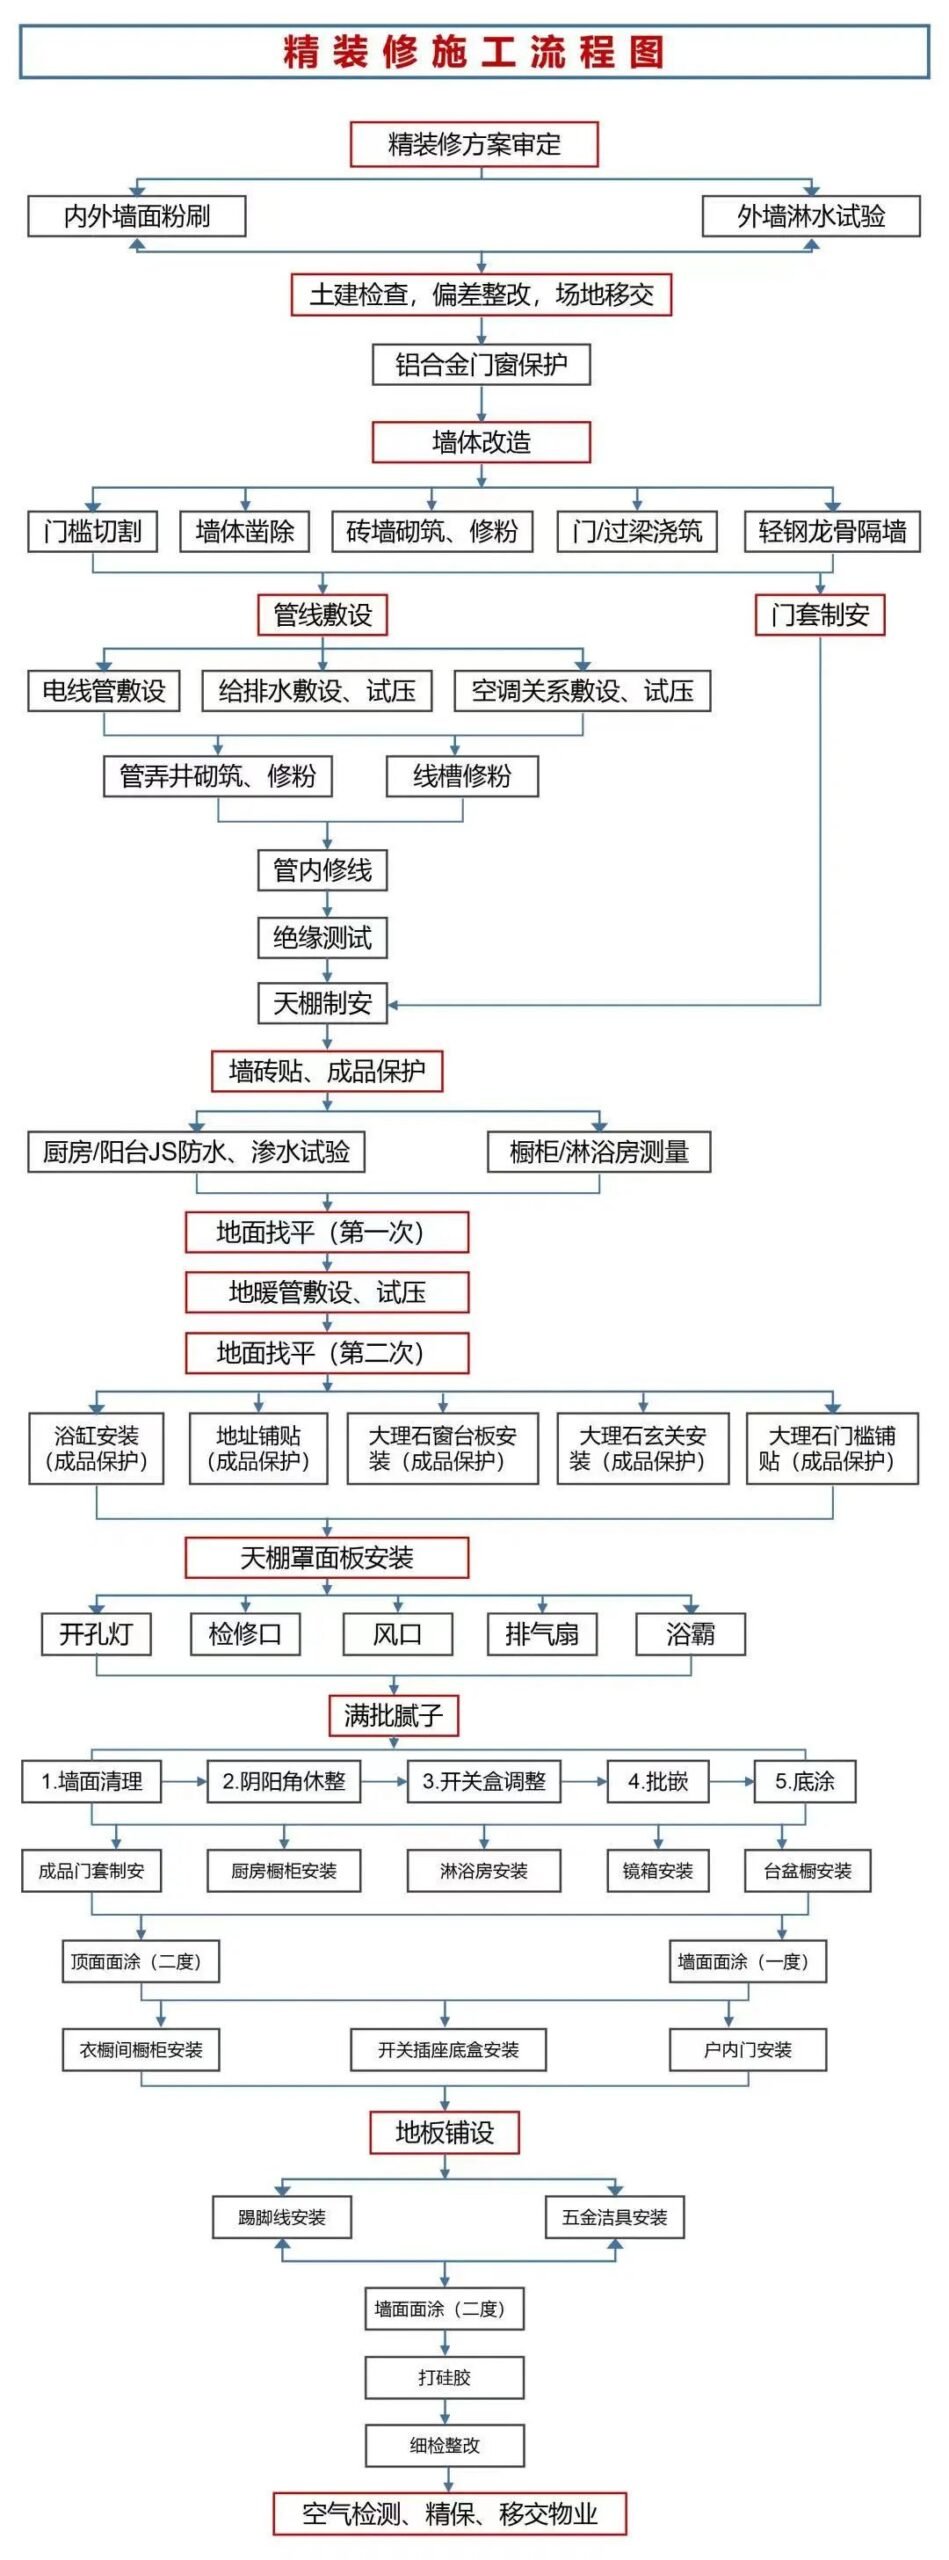
Finally, we use a diagram to summarize the whole process of hardcover construction: